|
Hold up! Did you see that video?! Do you feel amazed and inspired yet? I really hope you do because I'm going to introduce you to this awesome artist and we are going to make our own artwork in his style. But a little background info first! Clym Evernden studied fashion design before going on to make artwork for brands such as Samsung and Louis Vuitton. He has also created artwork for companies around the world! He calls his drawings "Folded Stories" and when you watch his videos, they really do feel like a story! Clym's video came up after I was looking at the artist from our last post (Vincent Bal) and I knew right away that you guys needed to see his work too! Clym's drawings change each time he unfolds the paper and by the end he has a completely different drawing than the one he started with! SO COOL! Make sure you check out his other video at the bottom of this post. You don't want to miss it. To get started making a Clym Evernden inspired artwork, you will need a few supplies:
First I'm going to show you how to fold your paper. Look below each picture for more directions or follow along with my video. Then scroll down to see my example drawing where I will tell you a little more about how to draw your folded story! 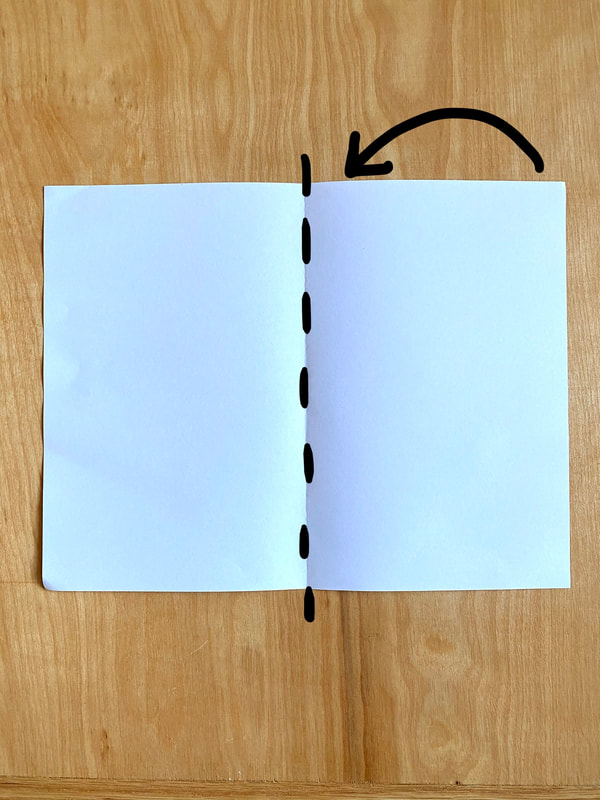 The most important thing you need to know about folding your paper is that you are always folding to the middle of the paper where you see my dashed line in the picture above. This will make your paper look like you have 2 doors to open when both sides are folded in. Step 1 - Fold your paper in half (like a card) and then unfold it so you have a crease in the middle. The crease will be a guide to help you fold both sides of your paper to the middle line. Step 2 - Fold the right side of your paper to the crease where you see the dashed line in my picture. Make sure the edge of your paper meets up with the crease from step one. You don't want your paper to be folded crooked! Note: When you are folding your paper, make sure you are pressing down on the fold. You can do this with your finger or use your finger nail to really press down. Doing this will also help your paper to fold better in each step. 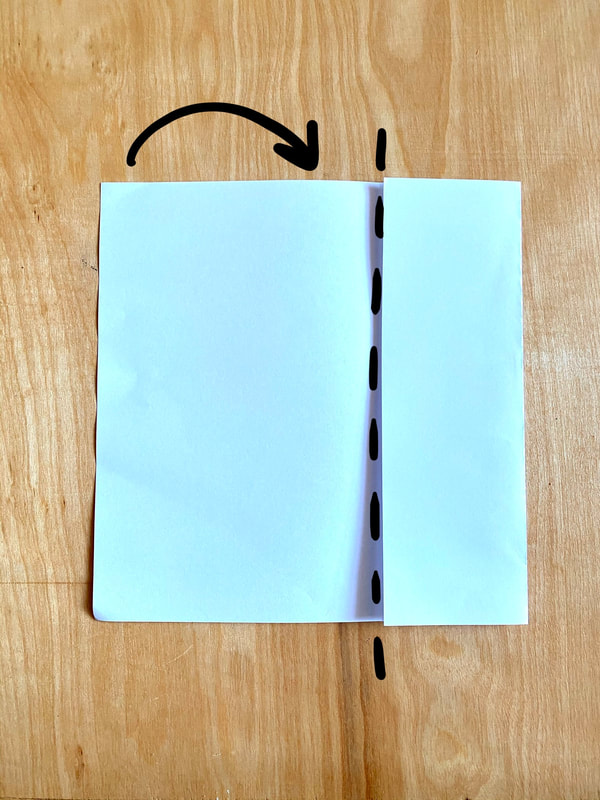 Step 3 - Fold the left side of your paper to the crease. Make sure the edge of your paper meets up with the crease and press down on the fold. 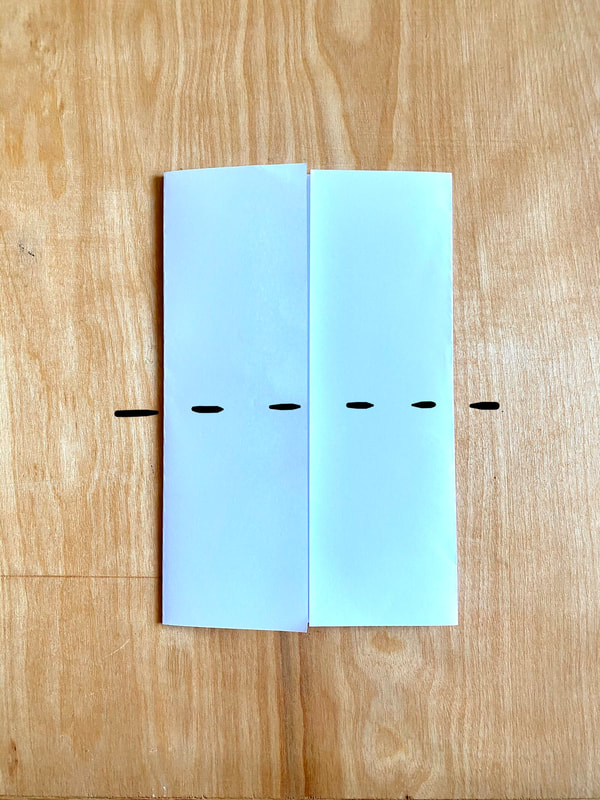 Step 4 - Now your paper should look like you have 2 doors that can open. Keep the "doors" closed and fold your paper in half to make a crease where you see my dashed line. This means that the top and bottom edges of your paper come together and press on your fold. After you make the crease unfold your paper again. 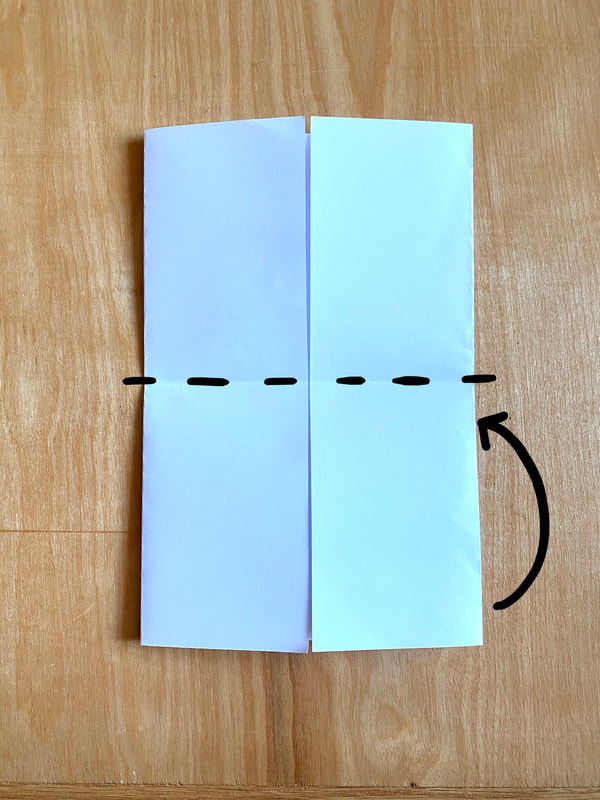 Step 5 - Fold the bottom of your paper up to meet the crease. Press the fold. 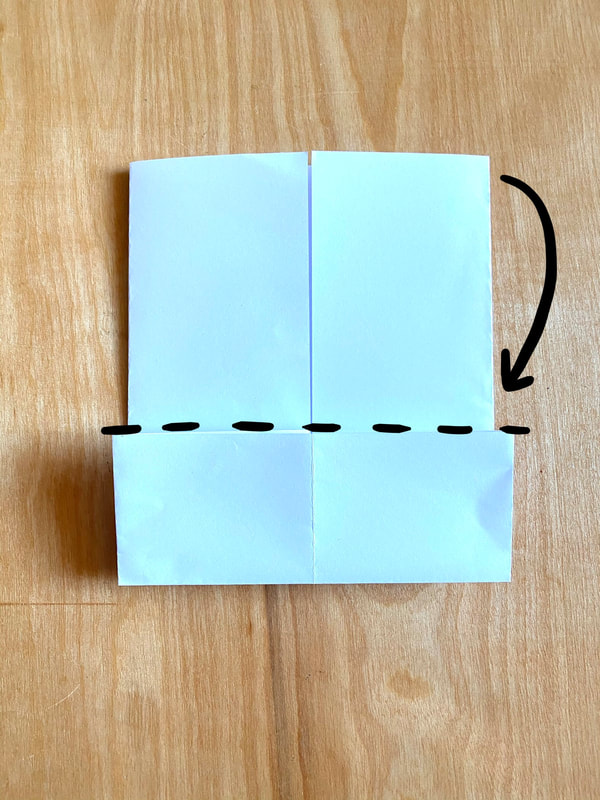 Step 6 - Fold the top of your paper down to meet the crease. Press the fold. 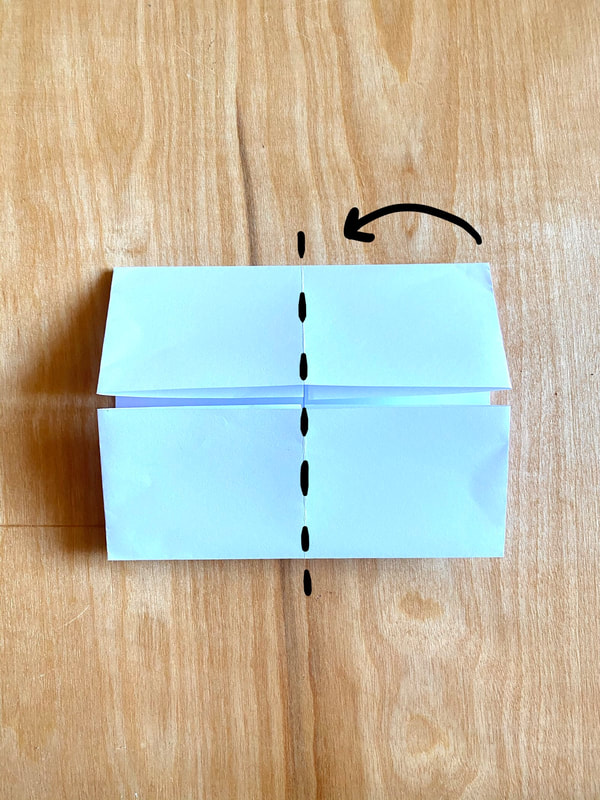 Step 7 - You should already have a crease in the middle from when we folded our paper in step 1. Fold the right side of your paper to the crease and press the fold. (Did you notice the folding pattern we've been doing? You'll be a pro at it by the end!) 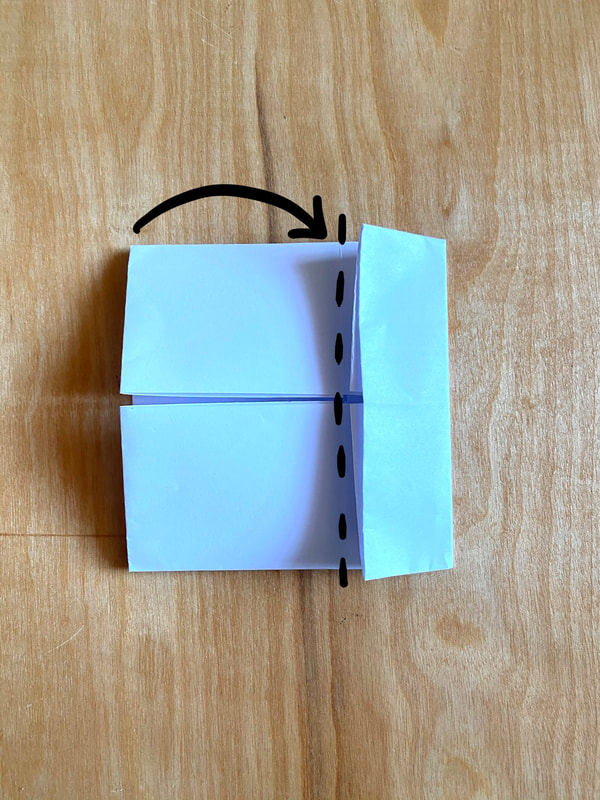 Step 8 - Fold the left side of your paper to the crease and press the fold. 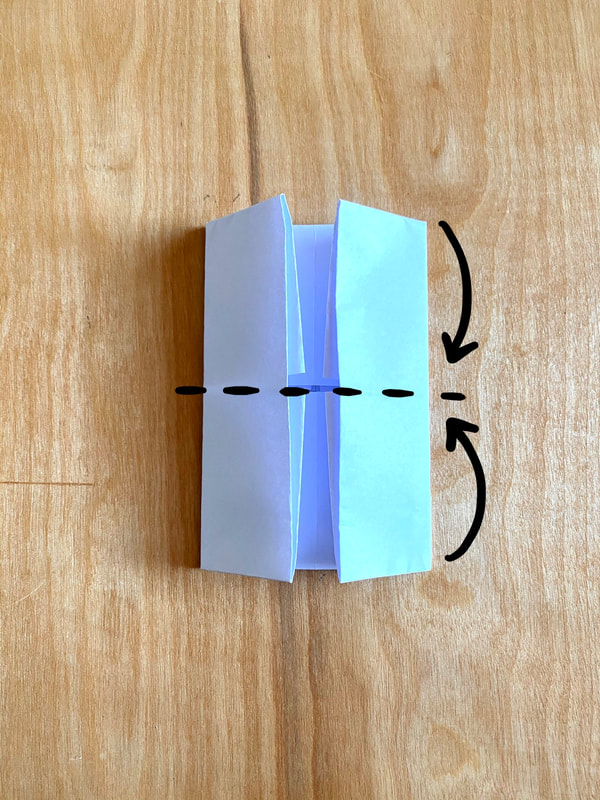 Step 9 - You should be able to see a crease on this step too from when we folded our paper before. Fold the top and bottom of your paper to meet the crease and make sure you really press the folds! As our paper is getting smaller, the folds are getting harder! 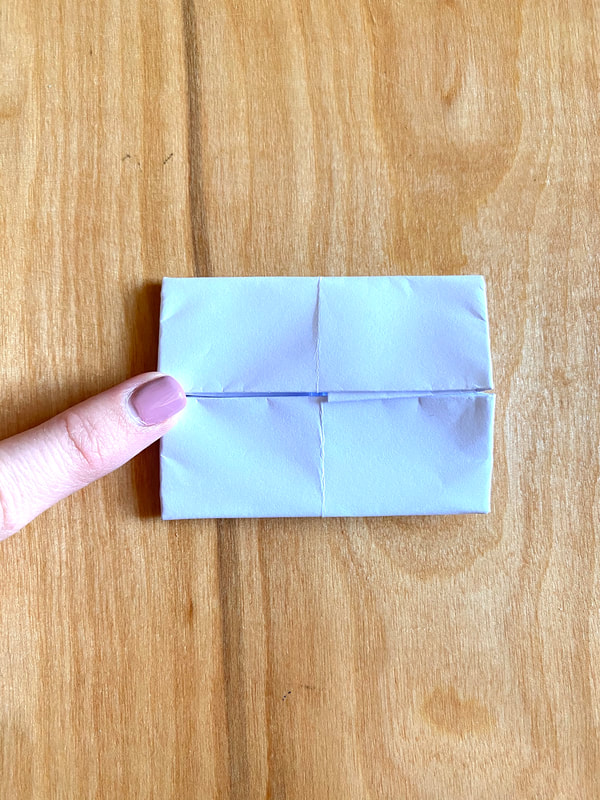 Now you are ready to begin your drawing! Steps for drawing:
|
 RSS Feed
